Hi, this is a very normal question, but I am unable understand what is the “List” option/checkbox and what does it do. It’s provided beside every “Field” when creating a “Form” from a “Table”.
The image below is a reference to an intermediate tutorial provided on Five’s Website. (2 - Create Forms | Five | Low-Code For Real Developers)

Hi Abu_Bakr_Siddique,
The List checkbox will include the field in the list.
We have three types of lists in Five.
The first one is the main list of records as shown in the image below. If a field has its List checkbox ticked the field will appear in this list. If you have a number of fields in the list a horizontal scroll will become available to scroll through the fields. I can see you are working with the Buys form, and have the Portfolio, Stocks, Quantity, and Total fields all included in the list. These fields would appear as below.

I see that you have Portfolio included in the list. What will happen here is if you are under a Portfolio record and you drill down to your Buys form by clicking the Down button (as shown in the image below), Five will automatically remove the Portfolio field from the list. This is because you have selected a Portfolio record and drilled down to the Buys form, so Five knows what Portfolio record you are using. If you had your Buys form at the top level (meaning you don’t drill down from a Portfolio record) Five would still include the Portfolio field in the list.

The second type of list we have is a list page type. As an example, in the Portfolio application you are working with, on the Exchanges form you make a Stocks list, shown in the image below.

This list becomes available when you click on the Stocks tab on the Exchanges form. All the fields on the Stocks form that have the List checkbox clicked will be included in this list, shown in the image below.

The third list is a lookup. This is available in a field. This is an automatically calculated value using the referenced form associated against this field. The value displayed in the lookup is calculated using a combination of List (Include in List) and the first best display type, ie, text as opposed to a GUID (key).

1 Like
Thank you so much @Jo-Anne. This really cleared my confusion on the Lists. A follow up question I have is, how would I go back to the same interface as the “New form Wizard” or “New Table Wizard” for an already created Form or Table?
e.g. I have used the edit button to check if I could for instance change the “List” checkbox settings or “Add Relationships” between already created Tables. But the interface isn’t the same as it was. Do I need to perform these through other actions to achieve similar outcomes for already created forms and tables?
Hi Abu_Bakr_Siddique,
Once you have saved a table or a form through the Table or Form Wizards, the wizards are no longer available, you will need to use the ‘forms’ to edit.
For example:
Add a Relationship (Foreign Key)
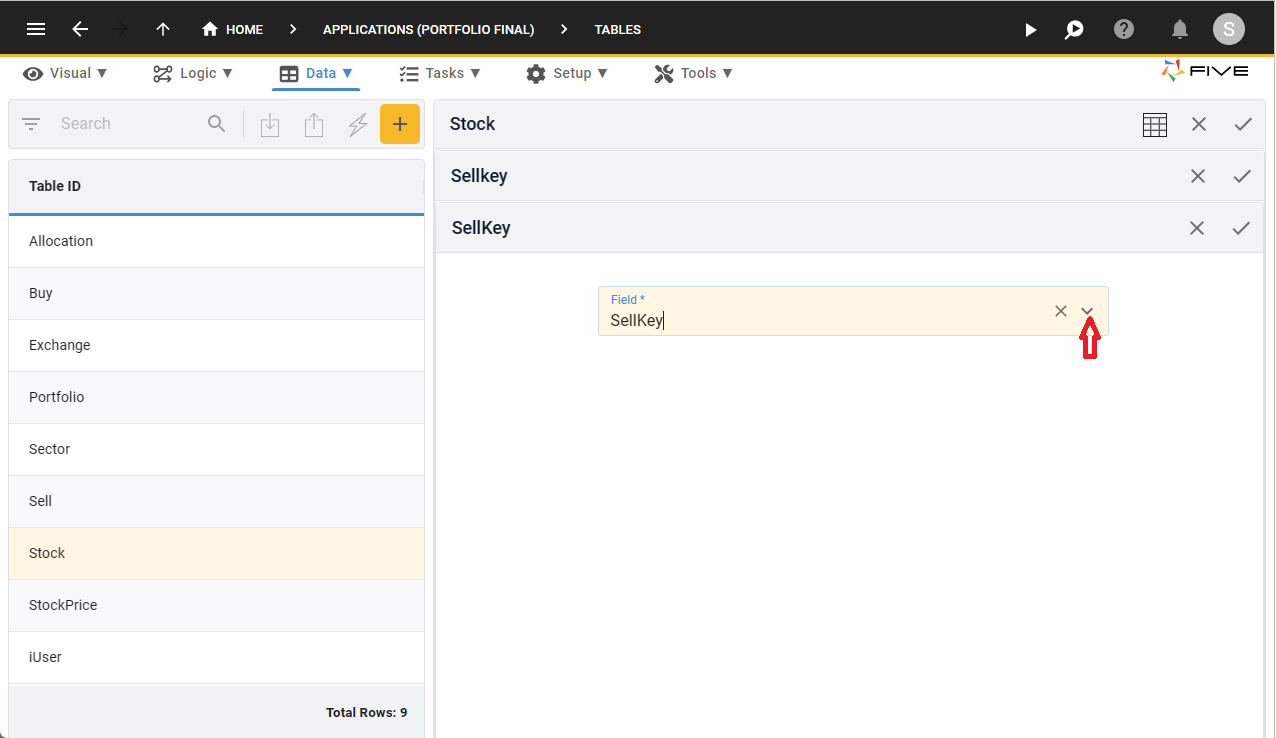
- Navigate to Tables.

-
Select the required record in the list.
-
Click the Fields tab.

- Click the Add Fields button.

-
Type an ID in the Field ID field.
-
Click the lookup icon in the Data Type field and select GUID.
-
Click the Save button in the form app bar.

- Click the Indices tab.

- Click the Add Indices button.

-
Type an ID in the Index ID field.
-
Click the lookup icon in the Key Type field and select Foreign.
-
Click the lookup icon in the Foreign Table field and select a table.
-
Click the lookup icon in the Dependent Index field and select an index. Note: This is the index on the foreign table.

- Click the Index Fields tab.

- Click the Add Index Fields button.

- Click the lookup icon in the Field field and select a field. Note: This is the field on the current table.
- Click all three Save buttons in the form app bar.

Edit the List Option on a Form
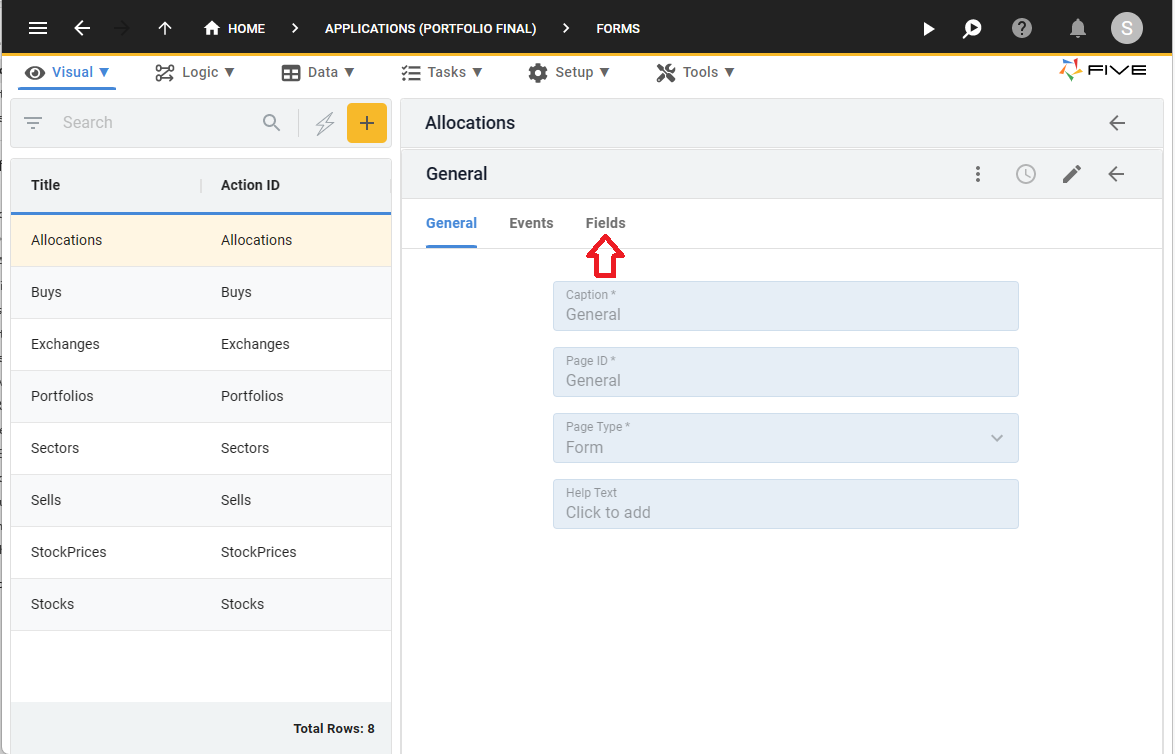
- Navigate to the Forms view.

-
Select the required record in the list.
-
Click the Pages tab.

- Select the Page record holding the field.

- Click the Fields tab.
- Select the required Field record.
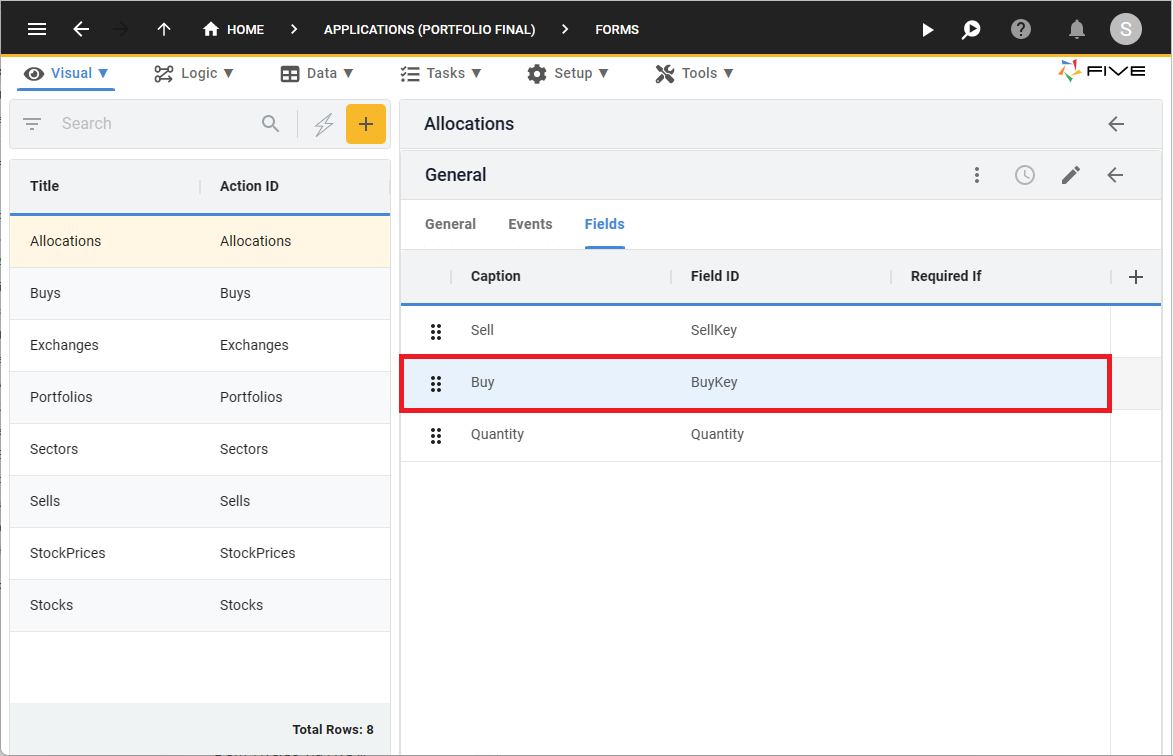
- Click the Edit button in the form app bar.

- Click the Include in List switch.

- Click the Save button in the form app bar.

- Click the Save button in the form app bar above the list.
